
When you’re ready to trade your salon‑style acrylics for a natural look, the first instinct is often to rush the process. But a hurried removal can leave your nail bed raw, cracked, or even infected. The key to a smooth transition is a methodical routine that respects the nail’s biology. Below is a practical, step‑by‑step approach that keeps your nails healthy while you enjoy the freedom of a clean, natural finish.
Why the Process Matters
Acrylic is engineered to be strong and long‑lasting, which is why it can be stubborn when you try to undo it. The polymer matrix clings tightly to the nail plate, and if you yank it away or use harsh chemicals, you risk peeling the natural nail, causing ingrown edges, or stripping the nail bed’s natural oils. A gentle, patient approach preserves the nail’s integrity, reduces the risk of infection, and gives you a smooth canvas for future manicures.


Pre‑Removal Checklist
Before you start, gather a few essentials. Having everything within reach means you can focus on the technique rather than hunting for tools mid‑process.
- Acetone (100% pure or a high‑strength blend). If you have sensitive skin, opt for a non‑acetone remover with added moisturizers.
- Soft cotton pads or cotton balls – the thicker the better for soaking.
- Aluminum foil or reusable plastic wrap; the foil traps heat, speeding up the softening.
- Fine‑grit file (400–600 grit). A coarse file can scratch the natural nail.
- Buffer block or a soft nail buffer to smooth edges after removal.
- Cuticle pusher or a small, flat tool (like a stainless‑steel nail tool).
- Cuticle oil or balm for post‑removal nourishment.
- Moisturizing lotion or hand cream rich in shea butter or vitamin E.
- Small bowl or container that fits comfortably in your hand.
- Optional: a soft brush (like a nylon toothbrush) to clean the nail surface.
Choosing the Right Acetone
Commercial acetone is a solvent that breaks down the acrylic polymer, turning it into a soft, crumbly mass. While it’s effective, it can also evaporate quickly, leaving your nail bed dry. For those who experience dryness or irritation, a non‑acetone remover containing glycerin, aloe, or panthenol can soften the acrylic while keeping the nail hydrated. Regardless of the type, the goal is to let the solvent work without forcing the acrylic apart.

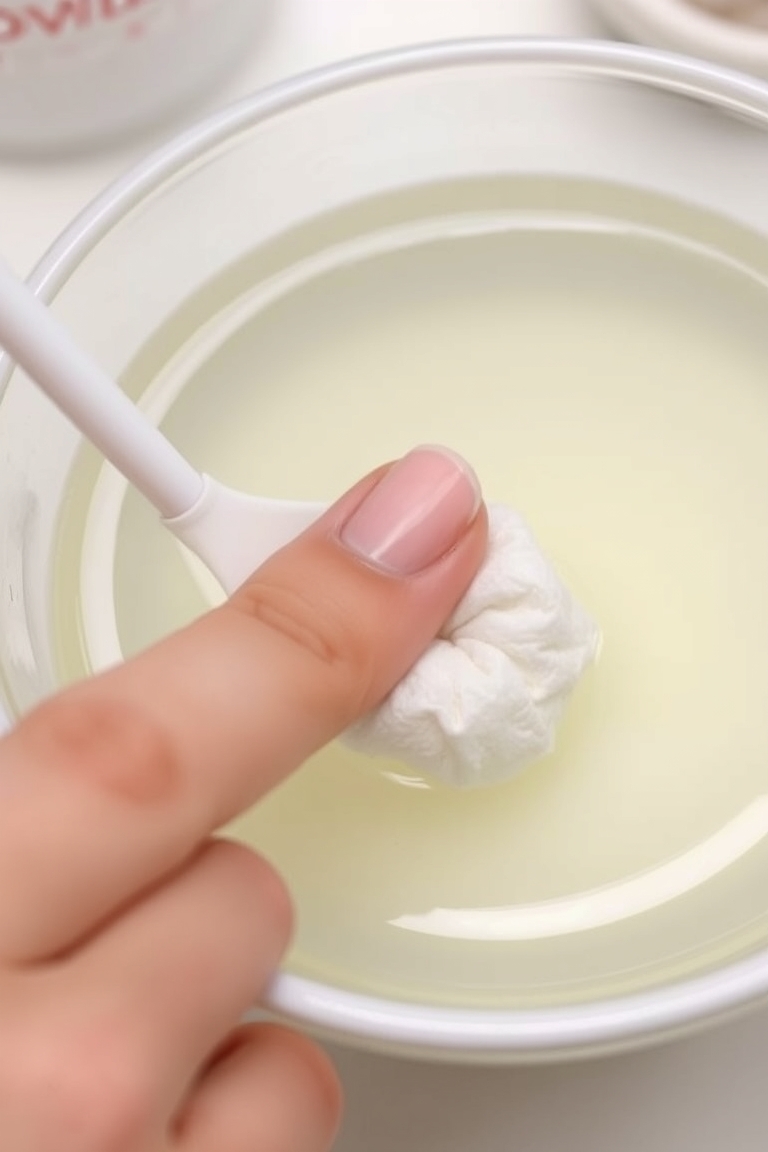
Step 1: Soak the Acrylic
Place a generous cotton pad on each nail, ensuring it covers the entire nail surface. Wrap a strip of foil around the pad – the foil creates a heat‑retaining seal that accelerates the softening process. If you don’t have foil, a piece of plastic wrap will suffice, though it’s less effective at trapping heat.
Submerge your hands in a bowl of warm water (not hot – water above 100°F can blister the cuticles) and let the nails soak for 10–15 minutes. If the acrylic feels stubborn after the first soak, give it a few more minutes, but avoid exceeding 20 minutes to prevent excessive drying of the nail bed.
Common Mistakes to Avoid During Soaking
- Using water that’s too hot, which can cause the cuticles to swell and become painful.
- Leaving the acetone on for too long, which can strip the natural nail’s natural oils.
- Applying the cotton too loosely, allowing the solvent to evaporate quickly.
Step 2: File the Acrylic Surface
After soaking, the acrylic will feel soft and slightly crumbly. Using a fine‑grit file, gently file the top layer of the acrylic in a downward motion. Avoid aggressive or circular filing, as that can push the acrylic deeper into the nail bed. The aim is to thin the acrylic so it can be lifted without pulling on the natural nail.
Once the surface is smooth, use a buffer block to polish the edges. This step not only removes any rough spots but also gives the nail a subtle sheen that’s easier to work with.
Step 3: Lift the Acrylic with Care
Now that the acrylic is softened and thinned, it’s time to lift. Using a cuticle pusher or a flat nail tool, gently pry up the edge of the acrylic. Work slowly, applying light pressure. If you encounter resistance, stop and give the nail another minute of soaking or file a bit more. Patience is the best defense against damage.
Tips for a Smooth Lift
- Work on one nail at a time to maintain focus.
- Keep a damp cloth nearby to wipe away excess acetone.
- Use a gentle back‑and‑forth motion rather than pulling straight up.
Step 4: Trim and Shape Your Natural Nail
With the acrylic removed, you’ll see a natural nail that may appear uneven or slightly ridged. Use a slightly coarser file (around 200–300 grit) to shape the nail into your preferred style—square, round, or almond. Finish with a fine polish or a gentle buff to smooth the edges.
Step 5: Replenish Moisture and Protect Your Nail Bed
Acetone can leave the nail plate dry and brittle. Apply a generous amount of cuticle oil or a nourishing lotion to the nail bed and surrounding skin. Massage it in to help restore moisture and promote healthy growth. If you’re prone to brittle nails, consider a weekly treatment with a strengthening serum that contains keratin or collagen peptides.
Common Pitfalls That Can Damage Your Nails
- Forcing the acrylic to pop off with a sharp tool—this can tear the nail plate.
- Using a harsh, abrasive file—opt for fine grit to protect the natural nail.
- Skipping the moisturizing step—dry nails are more susceptible to cracking.
- Letting the acetone sit for too long—over‑exposure can strip natural oils.
Alternative Methods for Acrylic Removal
If acetone makes you uncomfortable or you have sensitive skin, there are gentler options. Non‑acetone removers often contain a blend of mild solvents and moisturizers, reducing the drying effect. Some salons use a low‑acetone or “acetone‑free” solution that still softens the acrylic but is gentler on the nail bed.
Another option is to visit a professional. A salon technician can use a combination of soaking, filing, and gentle lifting to remove acrylics with minimal risk. Professionals also have access to high‑grade products and tools that may be difficult to find at home.
When to Seek Professional Help
While most acrylic removal can be safely done at home, certain situations warrant a salon visit:
- Repeated damage or ingrown nails after home removal.
- Severe nail bed irritation or infection.
- If you’ve had acrylics on for an extended period and the removal feels too difficult.
Keeping Your Nails Healthy After Removal
After you’ve successfully removed your acrylics, commit to a nail care routine that promotes strength and resilience. Here are a few habits to adopt:
- Apply a strengthening base coat once a week.
- Eat a balanced diet rich in biotin, vitamin E, and omega‑3 fatty acids.
- Avoid harsh chemicals and wear gloves when doing household chores.
- Give your nails a break—alternate between natural nails and a gentle, short‑lasting polish.
Frequently Asked Questions
- How to remove acrylic nails safely?
- Follow the step‑by‑step routine above: soak in acetone, file gently, lift the acrylic, trim the natural nail, and moisturize.
- Can I take off acrylics at home without damaging my nails?
- Yes—if you use the correct tools, avoid over‑soaking, and moisturize afterward, you can remove acrylics at home safely.
- What is the best way to soak off acrylic?
- Use a small bowl, cotton pads, and a foil wrap to trap heat. Soak for 10–15 minutes, then file and lift.
- How do I remove acrylics without damage?
- Gentle filing, slow lifting, and immediate moisturization prevent damage. Avoid harsh solvents or tools.
- What should I do if my nails feel weak after removal?
- Apply a strengthening serum, keep nails trimmed, and give them a break from polish. Hydration and a balanced diet help.
For more nail care insights and trends, visit Nailspalist and stay updated on the latest in salon, pro, and trend techniques. If you’re looking to keep your nails looking their best, check out our Nail Strengthening Tips guide for additional strategies.
Leave a Reply