Acrylic nail designs offer a level of versatility that few other manicure styles can match. I have spent years observing the shift from basic French tips to the complex, sculptural art we see today, and the beauty of acrylics lies in their structural strength. Because the polymer powder and liquid monomer create a hard protective layer, you have a literal canvas to work with, allowing for lengths and textures that natural nails simply cannot support.
The Evolution of Acrylic Nail Art
For a long time, acrylics were seen as purely functional—a way to add length or fix a broken nail. Now, we see them as a fashion statement. The industry has moved toward a blend of chemistry and creativity. We are seeing more integration of mixed media, such as encapsulated dried flowers, holographic foils, and 3D charms. The goal is no longer just “long nails,” but rather a cohesive aesthetic that reflects the wearer’s personality.
12 Acrylic Nail Designs: From Subtle to Bold
Choosing the right look depends on your lifestyle, your wardrobe, and how much maintenance you are willing to do. Here are twelve curated ideas ranging from the “quiet luxury” trend to high-impact maximalism.


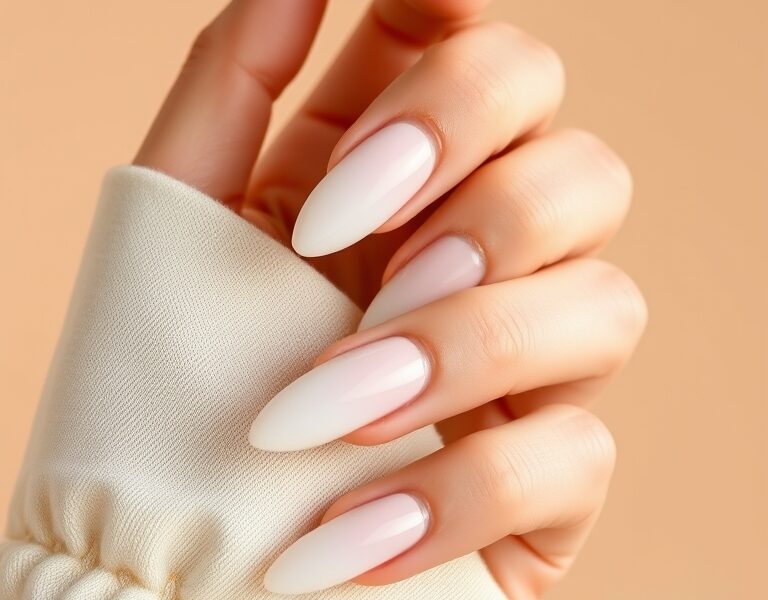
1. The Milky White Minimalist
This is the gold standard for those who want a clean, polished look. Instead of a stark, opaque white, a milky white translucent shade creates a softer appearance. It looks professional in an office setting but feels modern. I recommend a coffin shape for this design to keep it looking architectural and sharp.
2. Chrome Glazed Donut
Taking a cue from high-fashion trends, the glazed look involves applying a pearlescent chrome powder over a sheer nude or pale pink base. It catches the light beautifully without being overly flashy. This is one of the most requested acrylic set ideas because it complements every skin tone.
3. Classic French with a Twist
The traditional white tip is timeless, but we can modernize it. Try a micro-French line—an incredibly thin strip of color at the very edge of the nail. Alternatively, swap the white for a neon orange or a deep cobalt blue to add a pop of color to a neutral base.
4. Abstract Negative Space
Negative space designs use the natural nail (or a clear base) as part of the art. Think organic swooshes, asymmetrical dots, or geometric lines in a single contrasting color like black or gold. This style is great for those who don’t want their nails to feel too “heavy.”
5. Ombre Gradient Fade
Ombre is a staple in acrylic nail art. A popular version is the “Baby Boomer” look, which fades from a soft pink at the cuticle to a crisp white at the tip. For something bolder, try a sunset gradient moving from deep purple to bright yellow.
6. Velvet Cat-Eye Effect
Using magnetic polish over an acrylic base creates a three-dimensional depth that looks like velvet fabric. By moving a strong magnet over the wet polish, you can create a sharp line or a soft glow that shifts as you move your hands.
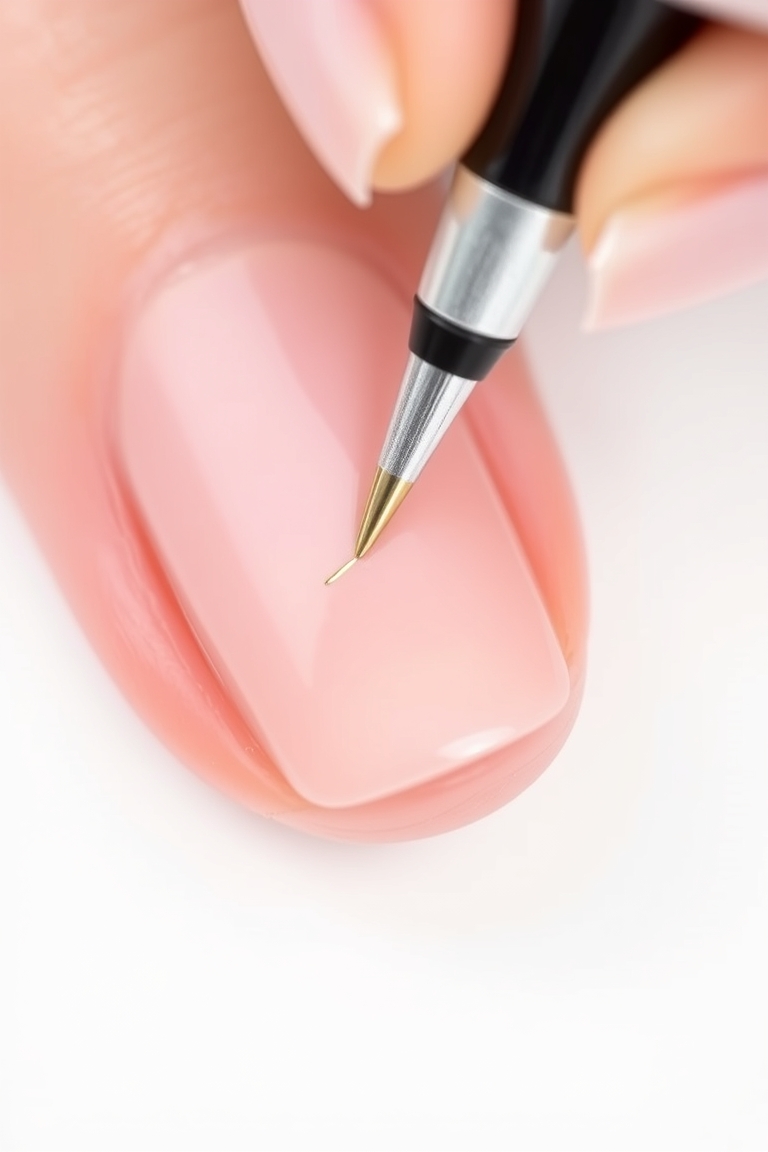
7. 3D Gel Sculptures
For those who love bold acrylic nail designs, 3D art is the peak. This involves using thick builder gels to create raised swirls, droplets of “water,” or intricate floral patterns. These designs are tactile and turn your nails into actual pieces of jewelry.
8. Tortoiseshell Patterns
This design uses layers of amber, brown, and black translucent gels to mimic the look of a tortoiseshell. It is an incredibly sophisticated choice for autumn and winter, pairing perfectly with gold rings and neutral knitwear.
9. Celestial Night Sky
A deep navy or black base paired with tiny hand-painted stars and a crescent moon. Adding a bit of silver glitter for a “galaxy” effect makes this a favorite for those who prefer a moody, artistic vibe.
10. Matte vs. Glossy Contrast
One of the simplest ways to make a set look high-end is to play with finishes. Apply a matte top coat to the entire nail, then use a glossy top coat to paint a French tip or a simple heart in the center. The contrast in texture is subtle but striking.
11. Vibrant Neon Swirls
Perfect for summer, neon swirls on a clear or nude base provide a high-energy look. I suggest using contrasting neons—like lime green and hot pink—to create a psychedelic 70s-inspired pattern.
12. Encapsulated Gold Leaf
Unlike stickers, encapsulated art is placed inside the acrylic layers. By placing real gold leaf or dried pressed flowers into the wet acrylic and then capping it with a clear top layer, the design is perfectly smooth to the touch and will never chip.
Choosing the Right Shape for Long Acrylic Designs
The shape of your nail completely changes the vibe of the design. When opting for long acrylic designs, consider how the shape interacts with your finger length and daily activities.
-
li>Coffin/Ballerina: Tapered sides with a flat top. This is the most popular choice for bold art because it provides a large surface area.
li>Stiletto: Extremely pointed. This is a high-drama look that works best with edgy, sharp designs but can be impractical for some jobs.
li>Almond: A soft, rounded point. This is the most flattering shape for elongating the fingers and works beautifully with subtle, classy designs.
li>Square: Straight edges. This is a classic look that provides a sturdy base for geometric patterns.
Professional Tips for Maintaining Your Acrylics
Getting the design is only half the battle; keeping them looking salon-fresh is where most people struggle. I always tell my clients that acrylics are an investment in time and money, so maintenance is key.
The Importance of Cuticle Oil
Acrylics can be drying to the surrounding skin. Applying a high-quality cuticle oil twice a day prevents hangnails and keeps the skin around the nail bed looking hydrated. This ensures that the transition between the acrylic and your natural nail remains seamless.
Avoid Using Nails as Tools
It is tempting to use a long nail to open a soda can or peel off a sticker. Do not do this. Applying pressure to the tip of an acrylic nail creates a leverage point that can cause the nail to lift or, worse, snap off, which can damage the natural nail underneath. Use a tool, not your nail.
Schedule Your Fills Regularly
As your natural nail grows, a gap appears between the cuticle and the acrylic. This is where “lifting” occurs. If you wait too long between fills, water and bacteria can get trapped in that gap, potentially leading to infections. I recommend a fill every 2 to 3 weeks to maintain the structural integrity of the set.
Acrylics vs. Gel: Which is Right for You?
Many people confuse the two, but they are chemically different. Acrylics are made from a liquid monomer and a powder polymer that air-dry. Gels are pre-mixed and require a UV or LED lamp to cure. Acrylics are generally harder and more durable, making them the superior choice for those who want extreme length or complex 3D acrylic nail art. Gels are often more flexible and have a more natural feel, but they cannot support the same weight as a heavy acrylic sculpture.
For more information on the chemistry of nail enhancements, you can explore the technical details of polymers on Wikipedia.
How to Communicate Your Vision to Your Nail Tech
There is nothing worse than leaving a salon with a set that doesn’t match what you had in mind. To get the best results, follow these steps:
-
li>Bring Reference Photos: A picture is worth a thousand words. Show your tech exactly what you mean by “milky white” or “abstract.”
li>Discuss Your Budget: Intricate art takes time. Detailed 3D work or hand-painted designs usually cost more than a solid color. Be clear about your budget upfront.
li>Be Honest About Your Lifestyle: If you type a lot for work or work with your hands, tell your tech. They might suggest a slightly shorter length or a more durable shape to prevent breakage.
li>Ask About the Process: If you are trying a new trend, ask how it’s achieved. Knowing if it’s a foil, a gel, or a powder helps you understand how to care for it.
If you are looking for more inspiration on how to pair your manicure with your overall style, check out our curated nail style guides for a complete look.
Common Mistakes to Avoid with Acrylics
I have seen many DIY attempts and poor salon applications. To keep your nails healthy, avoid these common pitfalls:
Forcing Off the Acrylics
The biggest sin in the nail world is peeling or ripping off acrylics. This pulls away layers of your natural nail plate, leaving them thin, brittle, and sensitive. Always have a professional soak them off using pure acetone or a professional electronic file.
Ignoring the “Lift”
If you notice a bubble or a gap where the acrylic is lifting from the nail, do not ignore it. Do not try to glue it back down with superglue. This traps moisture and can lead to “greenies” (pseudomonas), a bacterial infection that requires a full removal of the nail.
Over-Filing the Natural Nail
When prepping for a new set, some techs over-buff the natural nail to create a “grip.” If your nails feel sore or thin after a service, your tech may be too aggressive. The nail plate should be prepped, not sanded down.
FAQ: Everything You Need to Know About Acrylics
How do I choose the best acrylic nail designs for my hand shape?
For shorter fingers, I recommend almond or oval shapes with vertical designs (like thin lines or ombre) to create an illusion of length. For longer fingers, you can pull off almost anything, but square or coffin shapes look particularly balanced. Neutral colors tend to elongate, while bold, horizontal patterns can make the fingers appear shorter.
How long do acrylic nails typically last?
A full set of acrylics can last several weeks, but they will begin to look uneven as your natural nail grows. Most people find that a fill every 2 to 3 weeks is the sweet spot to keep the design looking fresh and the structure sound.
Can I do acrylic nail art at home?
While there are many kits available, acrylics require a specific skill set to apply without creating bubbles or causing lifting. If you are a beginner, I suggest starting with press-on acrylics or simple gel polish before attempting a full liquid-and-powder set.
Do acrylics damage your natural nails?
The acrylic material itself doesn’t damage the nail; however, the application and removal process can. Over-filing during prep or ripping the nails off during removal is what causes damage. When applied and removed by a professional, your natural nails can remain healthy.
What is the difference between a fill and a full set?
A full set is the initial application where the tips and acrylic are applied to all ten nails. A fill (or rebalance) is the process of filling in the growth gap at the cuticle and reshaping the free edge without removing the entire set.
Leave a Reply