Almond nail designs are widely regarded as the most universally flattering choice for anyone looking to elongate their fingers and add a touch of sophistication to their look. Unlike square nails, which can make the nail bed look shorter, or stiletto nails, which can feel too aggressive for a professional setting, the almond shape strikes a perfect balance. It mimics the natural curve of the cuticle while tapering to a soft, rounded point, creating a slimming effect that works for every hand type.
Why Almond Shaped Nails Are a Timeless Choice
I have spent years observing trends in the salon, and while shapes like coffin or ballerina trend in cycles, almond shaped nails remain a constant. The reason is simple: anatomy. The almond shape follows the organic lines of the human hand. By extending the length slightly beyond the fingertip and narrowing the sides, you create an optical illusion of length.
For those with shorter fingers or wider nail beds, this shape is a lifesaver. It draws the eye upward, making the hand appear more slender. Additionally, from a practical standpoint, the rounded tip is far less likely to snag on clothing or chip compared to a sharp square edge. This makes them a favorite for people who work with their hands but still want a polished aesthetic.


Choosing Your Base: Natural vs. Almond Acrylics
One of the first decisions you need to make is whether to grow your own nails or opt for enhancements. While natural nails are healthier in the long run, achieving a perfect almond taper on natural nails requires patience and a specific growth pattern.
The Natural Route
If you have strong natural nails, you can file them into an almond shape. The key is to keep the side walls straight for a few millimeters before curving them toward the center. I always recommend using a high-grit glass file to prevent peeling. However, natural nails are prone to breaking if they become too thin at the tip.
The Power of Almond Acrylics
For those who struggle with breakage or want instant length, almond acrylics are the gold standard. Acrylics provide the structural integrity needed to maintain that precise taper without the risk of snapping. Because the product is harder than the natural nail, you can achieve a more dramatic length while keeping the tip reinforced.
When getting acrylics, ensure your technician doesn’t make the apex too thick. A bulky apex can make the nail look clunky, defeating the purpose of the elegant almond silhouette. The goal is a seamless transition from the cuticle to the tip.
Elegant Almond Nails for the Professional Environment
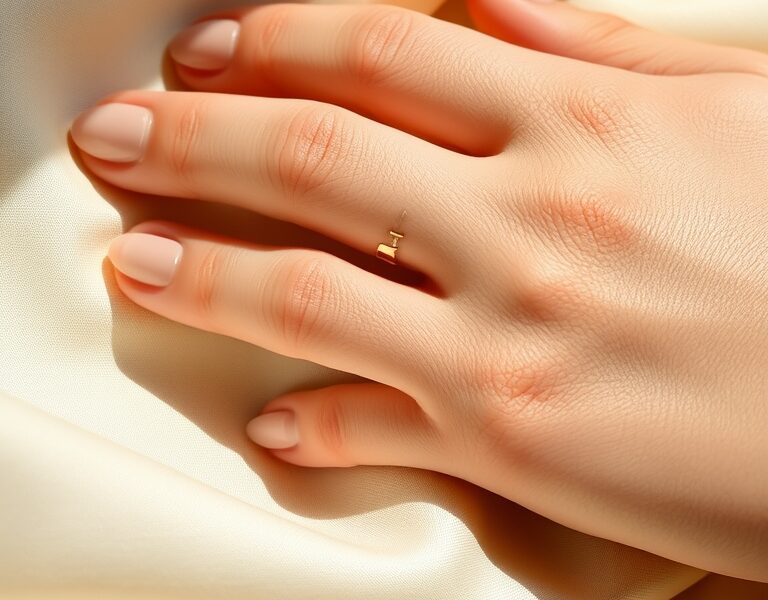
In a corporate or formal setting, you want a look that says “polished” rather than “distracting.” Elegant almond nails usually rely on a palette of neutrals, sheers, and muted tones.
- The Milky White: A semi-translucent white provides a clean, hygienic look that is softer than a stark optic white.
- The Classic Nude: Matching your polish to your skin tone creates a seamless extension of the finger, maximizing the elongating effect.
- Soft Mauve or Dusty Rose: These colors add a hint of femininity without being overly bold.
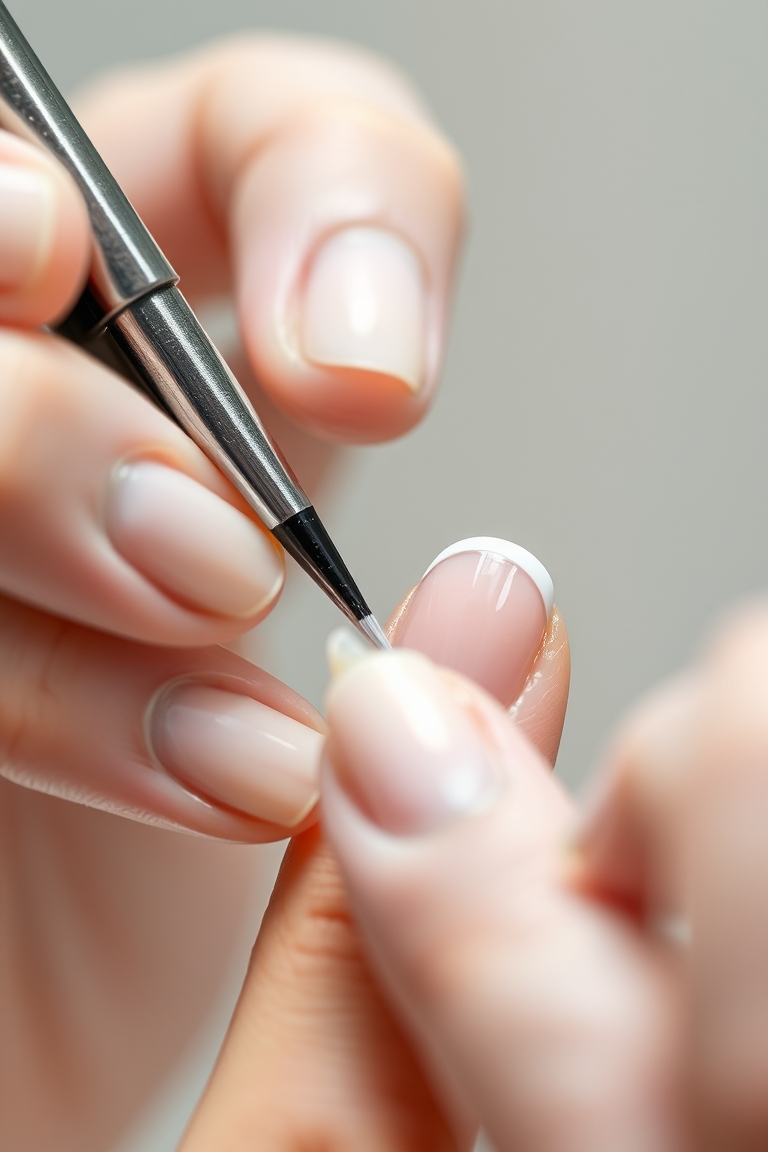
- The Modern French: Instead of a thick white band, try a micro-French line. A razor-thin white edge on an almond shape looks incredibly high-end.
To keep these looks fresh, I suggest a high-gloss top coat. A glossy finish reflects light, which further emphasizes the curve of the nail and makes the hand look hydrated and healthy. If you prefer a more modern twist, a velvet matte finish in a taupe shade can look very architectural and chic.
Creative Almond Nail Art Trends
Once you have the shape mastered, the canvas is open for almond nail art. Because the surface area is balanced, this shape handles complex designs better than almost any other.
Minimalist Geometry
Minimalism is currently dominating the industry. Think of a single thin black line running vertically down the center of a nude nail, or a tiny gold dot at the base of the cuticle. These designs don’t overwhelm the shape; they accentuate it.
Organic Swirls and Abstracts
Abstract swirls in contrasting colors (like cream and terracotta) follow the natural curve of the almond tip beautifully. By sweeping the lines from the side of the nail toward the center, you create a sense of movement that complements the hand’s gesture.
Chrome and Glazed Finishes
The “glazed donut” look is a perfect match for almond nails. The iridescent powder catches the light at the peak of the curve, adding a three-dimensional quality to the nail. This works exceptionally well with a pale pink or peach base.
Step-by-Step Guide to Filing Almond Nails at Home
If you are attempting to shape your nails yourself, precision is everything. Follow these steps to avoid over-filing the side walls, which can weaken the nail.
- Find Your Center: Look at the tip of your nail and identify the exact center point. This is your guide for the entire process.
- Straighten the Sides: Begin by filing the sides of the nail straight up from the nail bed. Do not start curving too early, or you will end up with an oval shape rather than an almond.
- Create the Taper: Once you have straight sides, start filing from the side toward the center point at a 45-degree angle.
- Round the Tip: Gently round off the point so it isn’t sharp. It should look like a literal almond—rounded but tapered.
- Check for Symmetry: Turn your hand around so you are looking at your nails from the perspective of another person. This is the only way to see if the taper is symmetrical.
For more detailed information on nail anatomy and health, you can refer to the Wikipedia page on nails to understand how the nail plate and matrix function.
Maintenance and Care for Long-Term Wear
Whether you have natural nails or acrylics, the almond shape requires specific care to prevent the tips from wearing down into a blunt oval.
First, cuticle oil is non-negotiable. Because almond nails are often longer, the stress on the nail bed is higher. Keeping the surrounding skin and the nail plate hydrated prevents the side walls from cracking. I recommend applying oil at least twice a day, especially after washing your hands.
Second, be mindful of how you use your fingertips. Using your nails as tools to open soda cans or peel stickers is the fastest way to ruin a perfect taper. Use the pads of your fingers instead.
Third, schedule regular fills if you are wearing acrylics. As the nail grows, the apex shifts forward, which can make the nail top-heavy and prone to snapping at the stress point. A professional fill every 2-3 weeks keeps the balance centered.
Matching Almond Designs to Your Hand Shape
While almond is universally flattering, slight adjustments can make it even better depending on your specific hand characteristics.
Short Fingers
If your fingers are short, aim for a slightly longer almond. The more length you add, the more you stretch the visual line of the hand. Stick to monochromatic colors or gradients (ombre) that fade from a darker base to a lighter tip.
Long, Slender Fingers
If you already have long fingers, you can afford to go with a shorter, more rounded almond. This prevents the hands from looking too “spidery” and keeps the look grounded and natural.
Wide Nail Beds
For those with wider nail beds, the key is to start the taper slightly earlier on the sides. This narrows the overall look of the nail and creates a more streamlined appearance. Avoid wide horizontal stripes in your nail art, as these can make the nail look wider.
The Psychology of Nail Shapes
Our hands are one of the primary ways we communicate. The shape of our nails can subtly change how we are perceived. Square nails often project a sense of stability and boldness. Stilettos project edge and confidence. Almond nails, however, project a sense of balance, grace, and approachability.
This is why they are so popular in professional environments. They show that you care about your grooming and aesthetics, but you aren’t prioritizing fashion over function. It is a sophisticated choice that blends the best of both worlds.
Integrating Almond Nails into Your Wardrobe
Your nails are an accessory, and like any accessory, they should complement your overall style. If you frequently wear neutral tones, linens, and soft fabrics, a sheer almond design will enhance that “quiet luxury” aesthetic.
If your style is more eclectic or bold, don’t be afraid to use your almond nails as a pop of color. Cobalt blue, deep emerald, or a vibrant orange on an almond shape looks intentional and artistic. Because the shape is so classic, it can handle loud colors without looking tacky.
You can find more inspiration for your next appointment by browsing our curated nail style lists to see what is trending in top salons.
Common Mistakes to Avoid with Almond Nails
Even experienced DIY enthusiasts make a few common errors when attempting almond nail designs. Avoiding these will save you from having to start over.
- Over-filing the Sides: If you file too deeply into the corners, you create a “notch” that becomes a prime spot for breaks. Keep the side walls strong.
- Ignoring the Cuticle: A great shape can be ruined by ragged cuticles. Always prep the nail bed by gently pushing back the cuticles to maximize the visible nail plate.
- Using the Wrong File: Avoid coarse metal files. They can cause micro-fractures in the nail plate, leading to peeling. Always use a fine-grit emery board or glass file.
- Neglecting the Top Coat: Because the tip of an almond nail is narrower, it is more exposed to wear. A high-quality top coat is essential to seal the edge and prevent lifting.
FAQ
What are the best almond nail designs for beginners?
For beginners, I recommend starting with a solid nude or a soft pink. These colors are forgiving and highlight the shape without requiring complex art. A simple white micro-French is also a great entry point into almond nail art.
Are almond shaped nails stronger than square nails?
Generally, yes. Square nails have sharp corners that are easily caught on things, leading to chips or tears. The rounded nature of the almond shape distributes impact more evenly, making them less likely to snag and break.
Can I get almond nails on short natural nails?
You can, but it will look more like an “oval” than a true “almond.” To get a true almond taper, you need a certain amount of length beyond the fingertip to create the slope. If your nails are very short, I suggest using almond acrylics or gel extensions.
How often should I reshape my almond nails?
If you are using natural nails, a quick touch-up with a file once a week will keep the tip from becoming too blunt. For acrylics, the shape is usually maintained by your technician during your 2-3 week fill appointment.
What colors look best on almond nails?
Almost every color works, but deep jewel tones like burgundy and navy look particularly sophisticated on this shape. For a more natural look, milky whites and soft beiges are the most flattering options.
Leave a Reply