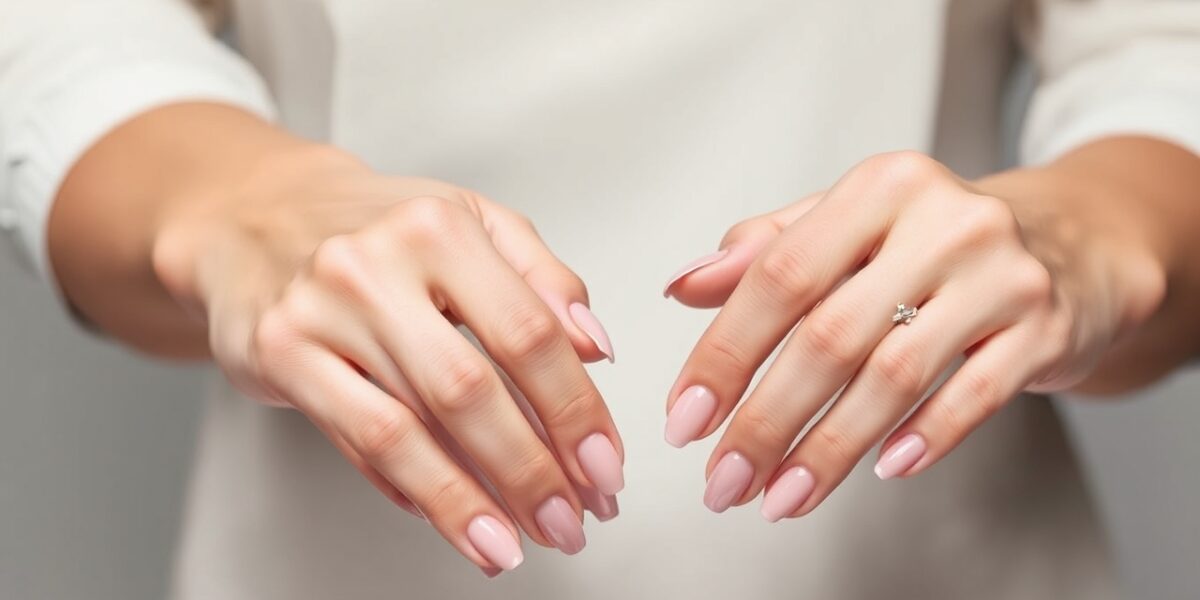
Ombre nail designs are a stunning way to add depth and personality to your manicure. This article walks you through the science, tools, and techniques that bring a gradient look to life, whether you’re a beginner or a seasoned pro.
Why Ombre Nail Designs Capture the Eye
From the early 2000s to today, ombre has remained a staple in nail artistry. The subtle shift from one hue to another creates a sense of movement, making each finger a canvas of color. The appeal lies in its versatility: you can pair it with a neutral base for a subtle daytime look, or go bold with neon gradients that command attention.
From Classic to Contemporary
- Classic Ombre: A single color that fades to clear.
- Two‑Tone Gradient: Two complementary shades flowing into one another.
- Rainbow Ombre: Multiple colors that transition smoothly.
- Faded Nail Art: A subtle wash that gives a vintage feel.
Tools and Materials Every Artist Needs
While the concept is simple, the execution depends on the right tools. Below is a checklist that will serve both DIY enthusiasts and salon professionals.


- High‑quality nail polish: Choose a brand with a smooth finish and good pigment concentration.
- Gradient brush or sponge: A tapered brush or a small, flat sponge works best for even color distribution.
- Base coat: Prevents staining and ensures a smooth foundation.
- Top coat: Adds shine and extends durability.
- Coloring stick or a Q‑tip: For precise control during the blending phase.
- Cleaning wipes: To keep the work area free of smudges.
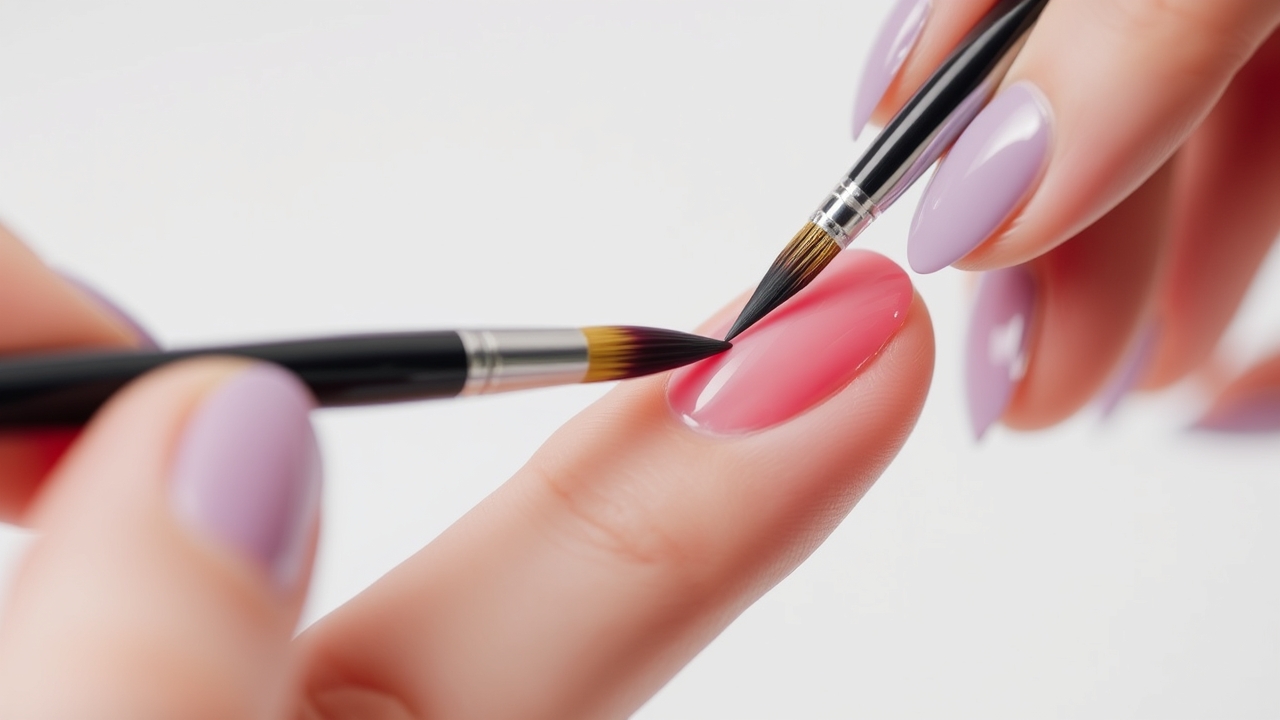
Step‑by‑Step Guide to Achieving a Flawless Gradient
Step 1: Prep the Nails
Start by removing any old polish, gently filing, and pushing back cuticles. A clean surface prevents uneven pigment absorption. Apply a thin base coat and let it dry completely.
Step 2: Apply the First Color Layer
Choose your dominant shade and apply a thin coat to the entire nail. Let it dry for 30–45 seconds; it should be tacky but not wet.
Step 3: Blend with a Gradient Tool
Dip a gradient brush or sponge into your secondary color. Lightly tap it onto the nail, then gently swipe from the cuticle to the tip. The key is to maintain a consistent pressure so the color blends evenly.
Step 4: Refine the Transition
Use a coloring stick or Q‑tip to touch up any harsh lines. If you’re aiming for a subtle fade, apply a light hand; for a dramatic shift, press firmly.
Step 5: Seal the Design
Once satisfied, apply a generous top coat. This locks in the gradient and adds a glossy finish that lasts weeks.
Tips for a Smooth Gradient
- Work in a well‑lit area: Natural light reveals any unevenness.
- Keep brushes clean: Residual pigment can cause streaks.
- Use a blotting paper: Quickly blot excess pigment to avoid smudging.
- Practice on paper: Before applying to nails, experiment with the brush technique on a small sheet.
Common Mistakes and How to Fix Them
- Too much pigment: Leads to clumpy layers. Thin down with a bit of water or a remover.
- Uneven drying: Can cause color separation. Let each layer dry fully before moving to the next.
- Skipping the base coat: Makes the gradient look dull. Never skip this step.
Ombre Nails How to: Variations That Wow
Once you master the basics, explore these variations to keep your nail game fresh.
- Monochrome Ombre: Use a single shade in varying concentrations.
- Two‑Tone Ombre: Pair a pastel with a neon for a striking contrast.
- Rainbow Ombre: Blend five to seven colors for a playful look.
- Faded Nail Art: Gradually fade from a saturated color to clear.
Gradient Nails vs. Traditional Nail Art
While traditional nail art focuses on patterns or solid colors, gradient nails emphasize a smooth color transition. The result is a more subtle, sophisticated aesthetic that can be adapted for any occasion.
Ombre Manicure Ideas for Every Occasion
- Office Friendly: Pale pink to clear gradient.
- Evening Out: Deep burgundy to black for a dramatic look.
- Summer Fun: Coral to turquoise for a beach vibe.
- Holiday Cheer: Red to gold for a festive touch.
Faded Nail Art: The Subtle Touch
Faded nail art is an evolution of the ombre concept. Instead of a sharp transition, the color gradually lightens to clear. This technique is perfect for a vintage or minimalist look.
Maintaining Your Gradient
To keep your ombre nails looking fresh, follow these tips:
- Apply a top coat every 3–4 days: This prevents chipping.
- Use a nail buffer: Lightly buff the surface to remove shine without stripping pigment.
- Avoid harsh chemicals: Use gloves when cleaning up around your nails.
DIY vs. Salon: Which is Right for You?
If you’re comfortable with the technique, DIY ombre nail designs can save money and allow for personalized color choices. However, a professional salon can offer precision and a longer lasting finish, especially for complex gradients.
Learn More About the History of Ombre
For a deeper dive into the origins of the ombre technique, visit Wikipedia to explore its cultural impact and evolution in fashion.
Resources for Nail Enthusiasts
For more nail care tips and trends, check out our comprehensive guide on nail health and design.
Choosing the Right Color Palette
The foundation of a stunning ombre lies in color selection. Here’s how to pick palettes that work for every skin tone and season.
- Monochromatic Schemes: Start with a base color and use its lighter and darker tints. For example, a deep navy fading into a sky‑blue creates a calm, professional look.
- Complementary Pairs: Pair colors opposite each other on the color wheel—emerald green to burnt orange or lavender to gold—to create a vibrant, eye‑catching gradient.
- Seasonal Themes: Use muted earth tones for fall, pastel hues for spring, neon for summer, and jewel tones for winter.
- Metallic Accents: Incorporate a metallic top layer or a subtle glitter fade for a touch of glam. A rose gold to silver gradient can look both chic and modern.
Advanced Ombre Techniques
Reverse Ombre
Instead of fading from base to tip, reverse ombre starts with a clear or light base that deepens toward the cuticle. This is perfect for short nails or when you want a subtle, “washed‑out” effect.
Glitter Ombre
Apply a glitter polish over a base color and then blend a clear or lighter glitter shade on top. The result is a shimmering gradient that glows in the light.
Matte Ombre
Use a matte top coat over a glossy gradient to create a unique, understated look. Matte ombre works well with muted colors and is ideal for a minimalist aesthetic.
Tools Deep Dive
While a basic brush or sponge can produce decent results, specialized tools can elevate your ombre game.
- Gradient Brush Sets: These often come with multiple tapered tips that allow for precise control over the depth of the gradient.
- Micro‑Sponge Pads: Designed to hold a small amount of polish, they provide a smooth, even application without the bulk of a traditional sponge.
- Coloring Stick: A flat, flexible stick that can be used to touch up lines or add extra depth to the gradient.
- UV/LED Gel Brushes: If you’re working with gel, these brushes are specifically engineered to work with the thicker consistency of gel polish.
Troubleshooting Common Issues
- Streaks or Banding: Often caused by uneven application. To fix, use a clean brush to gently feather the edges.
- Color Separation: Happens when layers dry too quickly or too slowly. Ensure each layer is tacky before adding the next.
- Uneven Fade: If the gradient is too sharp, apply a thin top coat to soften the transition.
- Fading Too Quickly: Use a high‑quality top coat with UV protection to lock in the pigment.
Ombre for Kids and Teens
Ombre isn’t just for adults. For younger clients, choose bright, playful colors and keep the gradient short to avoid overwhelming the nails.
- Pastel Rainbow: Blend soft pink, lavender, and mint for a sweet look.
- Neon Pops: Use neon green to neon pink for a fun, energetic vibe.
- Single‑Color Fade: A light blue fading into clear is simple yet striking.
Seasonal Ombre Ideas
- Spring: Peach to coral for a fresh, blooming feel.
- Summer: Turquoise to teal for a beachy vibe.
- Fall: Burgundy to burnt orange for a cozy, harvest look.
- Winter: Sapphire to silver for a sparkling holiday style.
Professional Tips: Gel and Acrylic Ombre
For salon pros, gel and acrylic ombre offer durability and a high‑gloss finish that’s hard to beat.
- Gel Ombre: Apply a base gel coat, then a thin layer of the first color, followed by a gradient brush to blend into the second color. Cure each layer under a UV or LED lamp.
- Acrylic Ombre: Mix a light monomer with a darker acrylic powder. Use a small brush to apply the lighter shade, then blend into the darker shade using a sponge.
- Top Coat: Finish with a gel top coat for a long‑lasting shine.
Maintenance and Longevity
To keep your gradient looking fresh for weeks, consider these habits:
- Regular Top Coat Refills: Reapply a top coat every 3–5 days to prevent chipping.
- Gentle Nail Care: Avoid harsh nail polish removers; opt for acetone‑free formulas.
- Moisturize Cuticles: Healthy cuticles prevent the polish from lifting.
- Avoid Excessive Water Exposure: Prolonged soaking can soften the polish; wear gloves when doing dishes.
Frequently Asked Questions
- What are ombre nail designs? Ombre nail designs are a gradient technique where one color fades into another, creating a subtle or dramatic transition across the nail surface.
- How long does a gradient manicure last? With proper care and a quality top coat, a gradient manicure typically lasts 7–10 days before needing a touch‑up.
- Can I use gel polish for ombre nails? Yes, gel polish works well for ombre; just follow the same layering and blending steps, and cure under a UV lamp after each layer.
- What tools are essential for a flawless gradient? A high‑quality brush or sponge, a base coat, two or more shades of polish, a top coat, and cleaning wipes are key.
- Is ombre suitable for all skin tones? Absolutely; choose colors that complement your skin undertone for the best effect.
- How do I fix streaks in my ombre? Use a clean brush to feather the edges or apply a thin top coat to soften the transition.
- Can I create ombre with only one color? Yes, by applying varying concentrations of the same shade, you can achieve a monochrome ombre effect.
- What’s the difference between ombre and a gradient? Ombre is a specific type of gradient that typically fades from a solid color to clear, while gradient can refer to any smooth color transition.
- How do I keep my ombre from chipping? Apply a high‑quality top coat, avoid harsh chemicals, and reapply the top coat every few days.
- Can I use nail art stickers on top of ombre? Absolutely—stickers or decals can add extra flair once your gradient is set and sealed.
Leave a Reply